Green screen photo booths are a fun, customizable way to enhance events like weddings, parties, and corporate gatherings. They let you replace a green backdrop with any digital background, creating unique photos instantly. Here’s a quick overview of what you need to set up a professional green screen photo booth:
-
Backdrop: Use a non-reflective green fabric (e.g., 8 ft x 7.5 ft) or blue if guests wear green.
-
Lighting: Evenly illuminate with LED lights at 45° angles to avoid shadows and color spill.
-
Camera: DSLR or mirrorless cameras work best for sharp, high-quality shots.
-
Software: Choose chroma key software with real-time preview and customization options.
-
Space: Ensure enough room for guests to stand 8 ft from the screen to prevent color spill.
Proper setup, testing, and maintenance are key to creating seamless, high-quality photos that guests will love. Whether for branding or fun, green screen booths are a versatile addition to any event.
Green Screen Basics – Darkroom Booth 2024
Required Equipment and Tools for Green Screen Setup
To achieve high-quality results with a green screen photo booth, you’ll need the right combination of backdrops, lighting, and camera equipment.
Green Screen Backdrops
The backdrop is the foundation of any green screen setup. Non-reflective fabrics like muslin or cotton are ideal, as they minimize hotspots caused by lighting. A backdrop measuring 8 ft wide by 7.5 ft tall is a comfortable size for accommodating multiple guests.
Here are some backdrop options to fit different budgets and needs:
-
Budget-Friendly: The EMART Green Screen Backdrop (6 x 9 ft) is priced at $13.99 and works well for smaller setups.
-
Standard Size: The GFCC Green Screen Backdrop (10 x 10 ft) costs $27.99 and has received a solid 4.4-star rating from over 9,200 customers.
-
Professional Grade: The RevoSpin Green Screen Photo Booth Single Sided Backdrop, priced at $500, offers commercial-level durability.
Fabric backdrops are durable and maintain consistent color over time. For even better results, ultra-tension backdrop systems are worth considering. These help reduce shadows and improve the overall quality of digital effects.
Green is typically the go-to color for chroma keying because it works well under most lighting conditions. However, if your event features costumes or props with green tones, electric blue is an excellent alternative. Both green and blue are rarely found in natural skin tones, making them perfect for this purpose.
Once you’ve selected your backdrop, proper lighting will ensure it performs at its best.
Lighting Equipment
Even, consistent lighting is critical for chroma keying success. Continuous LED lighting is often preferred over flash because it allows you to see the lighting setup in real time, making adjustments easier before shooting.
To achieve soft, uniform illumination, position at least two light sources at 45° angles to the backdrop. Using diffusers will help reduce harsh shadows.
Here are a few lighting options across different price ranges:
Budget Options:
-
Clamp lights with fluorescent bulbs from Home Depot, available for around $10 each.
-
Herrfilk 13-inch Ring Light for $49.99 (4.3/5 stars from 1,118 reviews).
-
Aiknow RGB LED Lights (2-pack) for $48.99 (4.3/5 stars from 110 reviews).
Professional Grade:
-
YICOE LED Softbox Lighting Kit for $79.99 (4.6/5 stars from 2,074 reviews).
-
IVISII 19-inch Ring Light for $139.99 (4.6/5 stars from 2,225 reviews).
-
RALENO 2 Packs Warm/Cool LED Light for $163.99 (4.6/5 stars from 1,928 reviews).
For green screen photography, a color temperature of around 4100K is recommended. Manual adjustment of color temperature is best, as relying on auto white balance can lead to inconsistent results.
With your lighting dialed in, the next step is selecting the right photo booth hardware and camera.
Photo Booth Hardware and Cameras
When it comes to capturing high-quality images, DSLR or mirrorless cameras outperform smartphones or webcams, especially for motion shots.
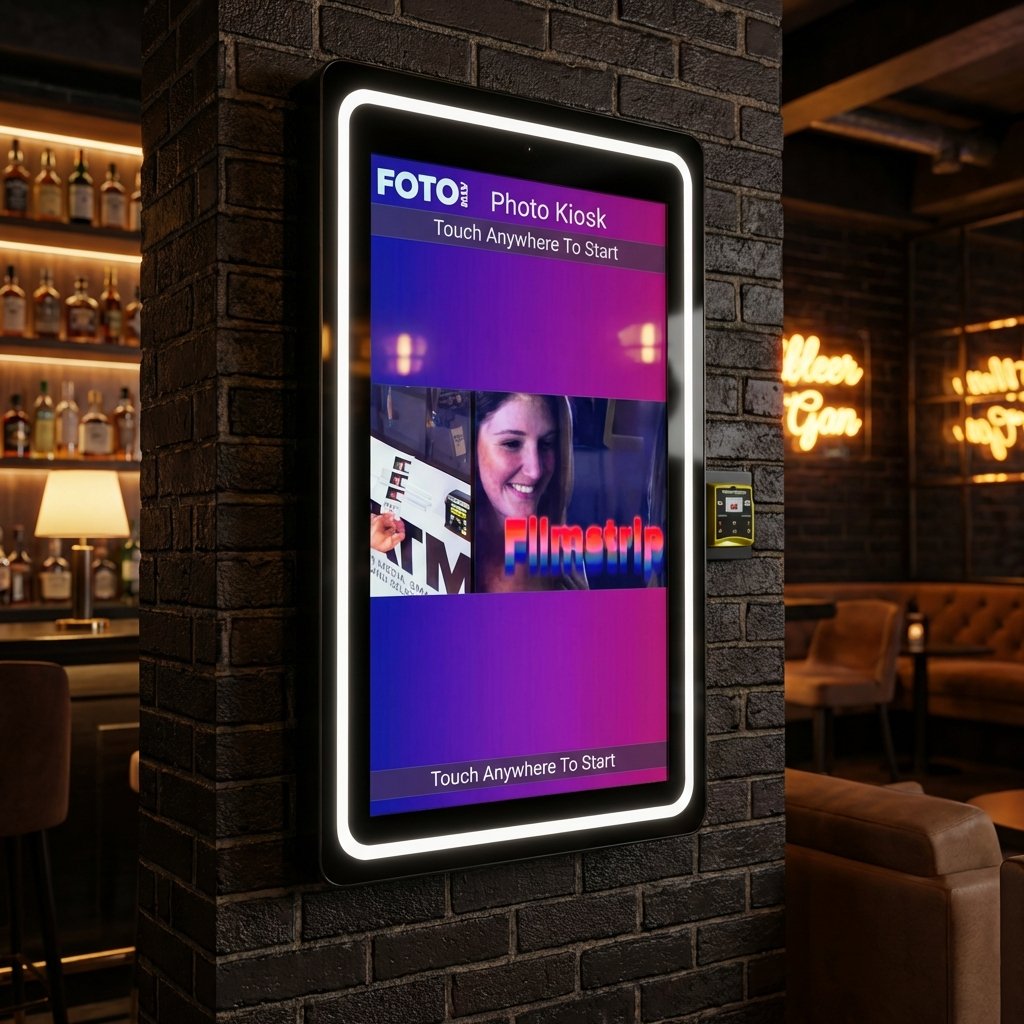
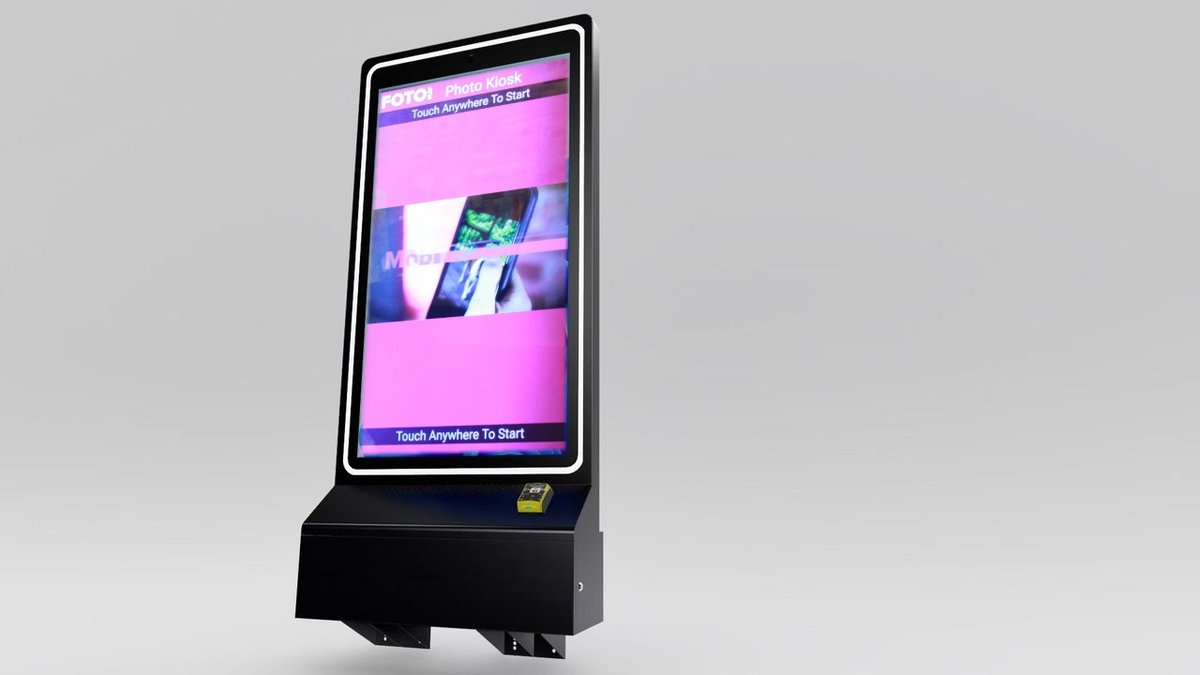
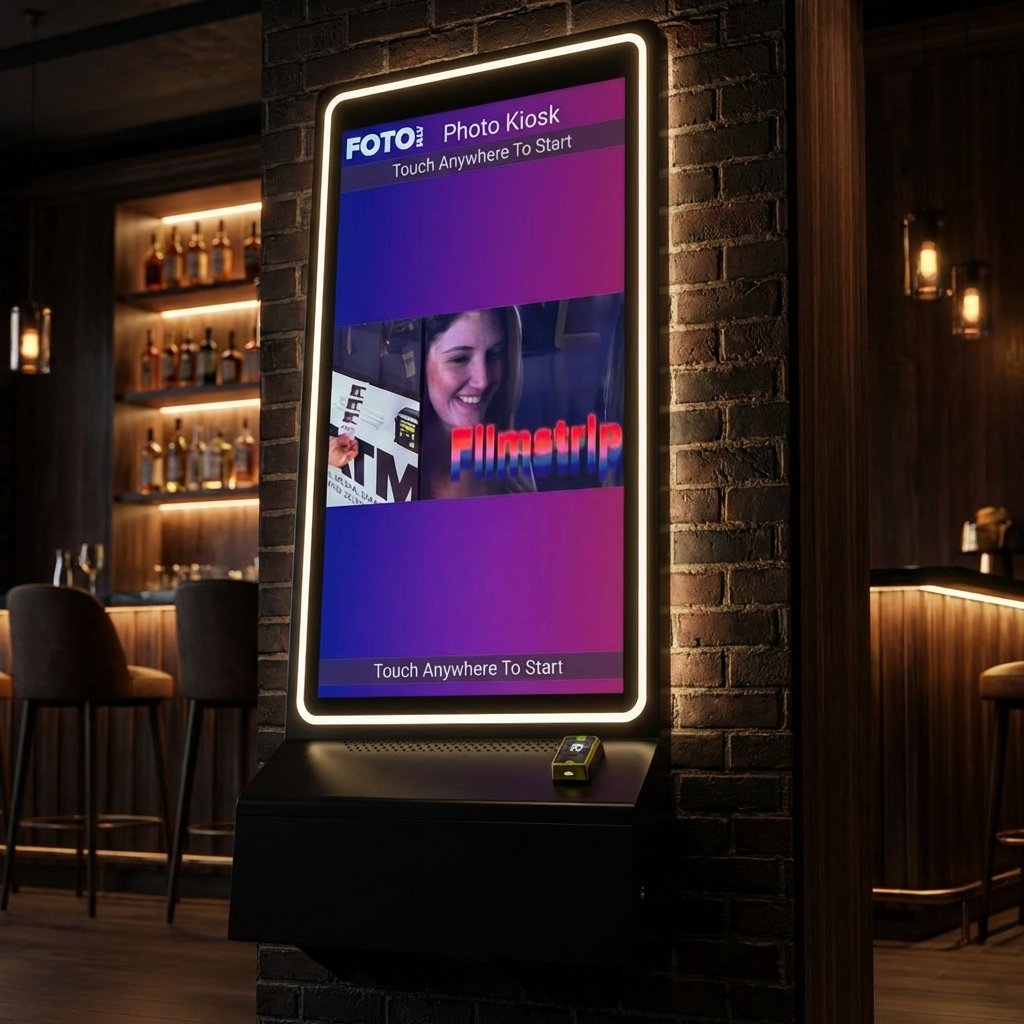
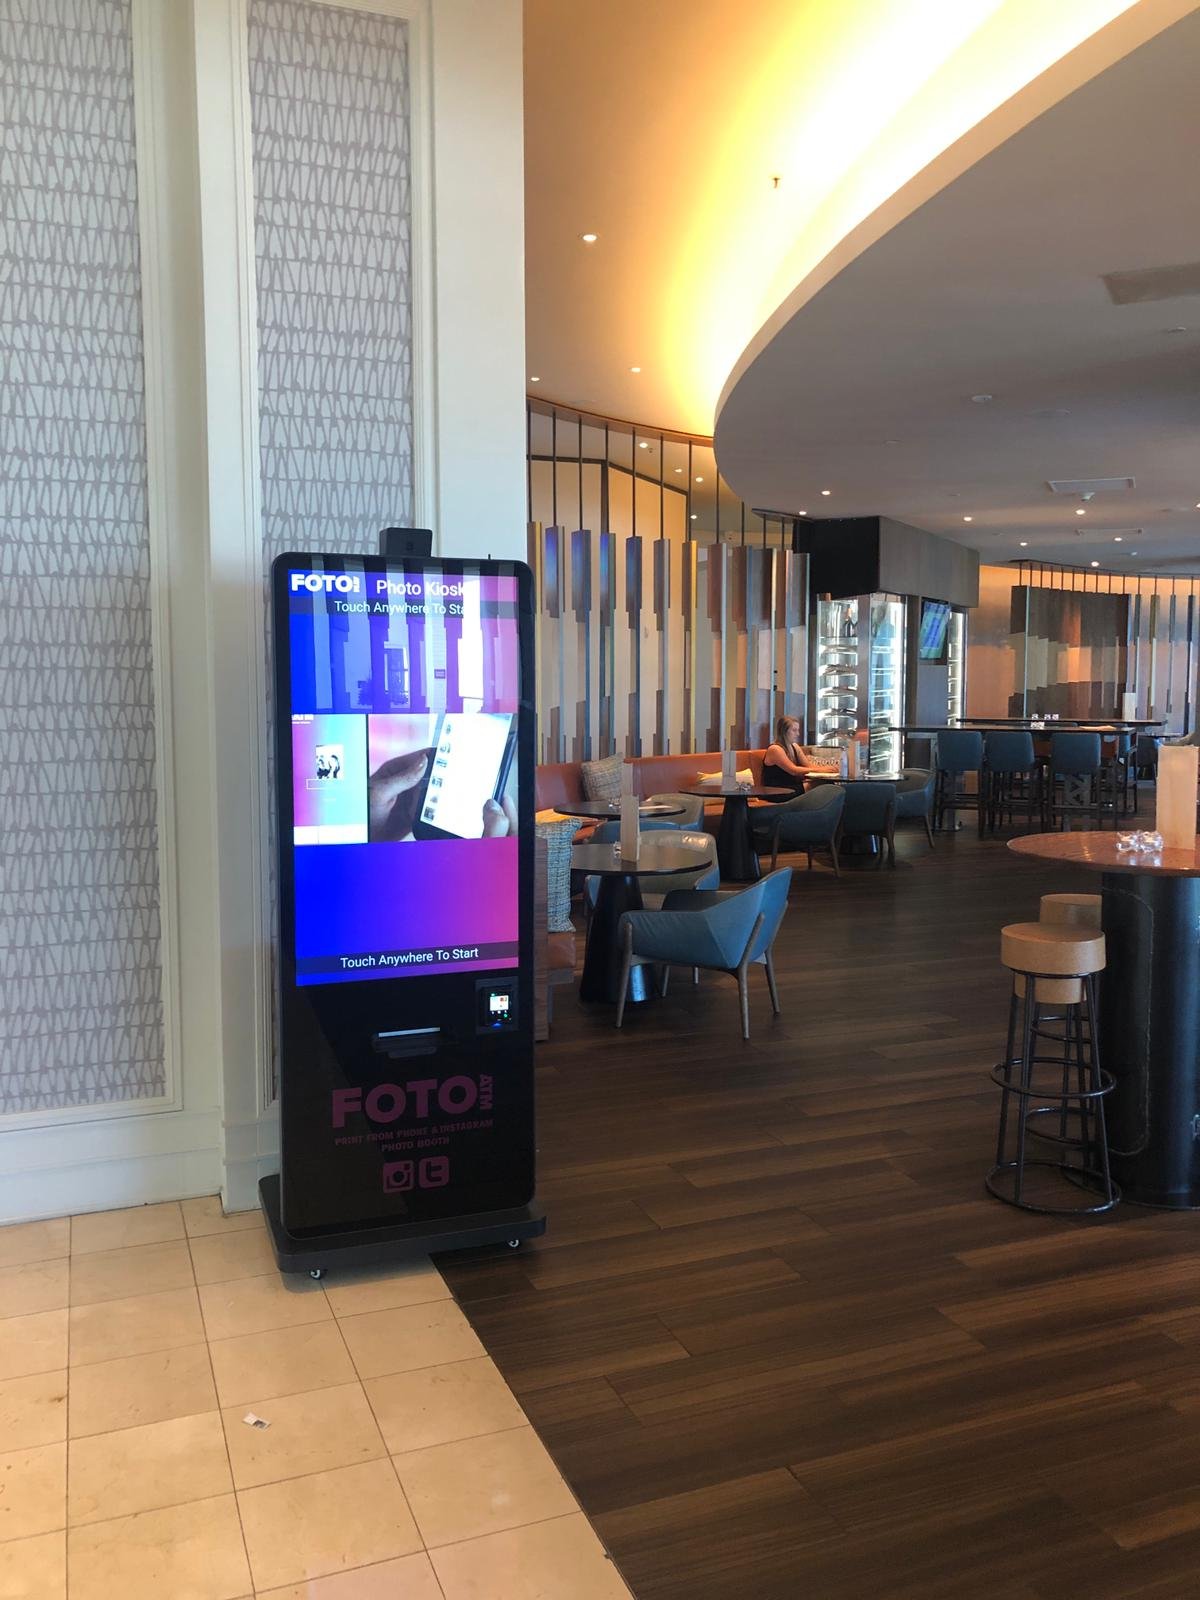
Foto ATM offers two all-in-one kiosk options designed for green screen setups:
-
Foto ATM Vista Kiosk: This model features a 49-inch touchscreen, built-in camera, and secure locking cabinet, priced at $7,999. Volume discounts are available.
-
Foto ATM Vero Kiosk: A more compact option with a 32-inch touchscreen and built-in camera system for $4,999. Volume discounts are also available.
Both kiosks include Primera IP60 printers and convertible EMV/bill acceptor mounts, making them comprehensive photo booth solutions. To ensure stable and consistent framing, invest in a sturdy tripod or camera mount. Look for adjustable legs and tilt features to accommodate different guest heights and configurations. The Tether Tools Vu Booth is an excellent choice, as it includes mounts for both your camera and monitor.
For setups requiring integrated lighting, look for kiosks with built-in ring lights that eliminate hard shadows and reduce the need for extra lighting equipment. Additionally, ensure your subject stands far enough from the green screen to avoid color spill and maintain proper lighting separation.
Green Screen Software Setup and Integration
Once you’ve got your hardware set up, the next step is getting the software in place. This is what brings your green screen photo booth to life, handling the chroma key process and providing an easy-to-use interface for events.
Choosing the Right Photo Booth Software
The backbone of any successful green screen photo booth is software with solid chroma key capabilities. It needs to remove green or blue backgrounds flawlessly and replace them with digital images. A real-time preview feature is a must – it lets guests see how the final photo will look before it’s taken, cutting down on retakes.
Look for software that comes with tools like color pickers and adjustment sliders. These features allow you to fine-tune the chroma key process by selecting the precise shade to remove and perfecting the background replacement. For example, Foto ATM’s Professional plan, priced at $119 per month, uses AI-powered Green Screen technology that even works without a physical green screen.
Background flexibility is another critical feature. Your software should let guests choose from a variety of pre-loaded backgrounds or upload their own custom images. Automated background cycling can keep things exciting by rotating through different backdrops. Additional options like template editors for customizing prints with logos or text, overlay effects for depth, and sharing tools via email, SMS, or QR codes make the experience even better. Social media integration, such as Foto ATM’s hashtag wall, can amplify your booth’s impact by extending its reach beyond the event.
Step-by-Step Software Configuration
Once you’ve picked the right software, it’s time to set it up. Start by confirming that the software works with your camera setup, whether you’re using a DSLR, a mirrorless camera, or the built-in cameras in Foto ATM’s Vista or Vero kiosks. Begin by selecting your chroma key color – most software supports both green and blue screens, giving you flexibility depending on your backdrop.
Next, upload high-resolution digital backgrounds that match the lighting and perspective of your setup. Fine-tune the settings by adjusting color tolerance, edge feathering, and spill suppression to ensure clean and professional results.
Before the event, run thorough tests. Take sample shots with different poses, clothing, and lighting conditions to see how the software handles tricky elements like hair, transparent objects, and reflective surfaces. If you’re offering physical prints, configure print templates with event branding, logos, or custom text. Finally, make sure the sharing options – whether via email, SMS, or social media – are working smoothly.
Once your local setup is fine-tuned, you can move on to remote management for easier control during events.
Cloud-Based Integration for Remote Management
After setting up the software locally, cloud integration can take your photo booth to the next level by giving you control from anywhere. Foto ATM’s cloud-based system allows you to manage multiple events at once and make adjustments in real-time, even if you’re off-site.
With real-time analytics, you can gather insights into usage trends, popular backgrounds, and peak activity times. This data not only helps you improve future setups but can also be used to show clients the value of your service. Remote management features let you update backgrounds, tweak settings, and troubleshoot issues from any location with an internet connection. Plus, cloud storage ensures all photos are backed up and easy to access after the event.
Cloud-based systems also simplify payment processing. Foto ATM’s kiosks come equipped with EMV and bill acceptor mounts, and all transactions are tracked through the cloud. Automatic software updates and remote feature rollouts keep your booth running smoothly, while cloud-based scheduling reduces setup time and ensures event-specific configurations are ready to go.
sbb-itb-3201140
Step-by-Step Green Screen Photo Booth Setup
Now that your software is ready to go, it’s time to focus on the physical setup for your green screen photo booth. This involves selecting the right location, installing the green screen backdrop, and fine-tuning your lighting and camera settings to ensure everything runs smoothly.
Preparing the Location
Start by picking a spot with plenty of space and manageable lighting conditions. You’ll need enough room to position the green screen, camera, and lights while keeping a comfortable distance between them and your subjects. This spacing is crucial for avoiding shadows and ensuring clean keying.
Make sure there’s a reliable power source nearby since you’ll need it for your LED lights and camera equipment. It’s also a good idea to plan the layout to allow guests to move freely without creating bottlenecks. Keep the lighting and camera setup out of the way of foot traffic while still positioned for the best results.
Once your location is ready, it’s time to set up the green screen.
Installing the Green Screen
A smooth, wrinkle-free green screen is non-negotiable for high-quality photos. Aim for a screen that’s about 8 ft by 8 ft, with a matte finish to reduce glare. Whether you’re using stands or mounting the screen directly to a wall, make sure it’s stretched tightly, but not so much that it risks tearing or distorting.
If you’re mounting it on a wall, double-check that your fixtures are level and sturdy enough to hold the screen securely. A properly installed matte screen will help minimize reflections and make the chroma key process much easier.
With the backdrop in place, the next step is dialing in your lighting and camera settings.
Optimizing Lighting and Camera Settings
Lighting is everything when it comes to green screen photography. Use angled LED lights to evenly illuminate the screen and separate lights to highlight your subjects. Avoid placing lights directly behind your subjects, as this can cause unwanted spillover onto the backdrop.
For your camera, adjust the settings manually. Set the white balance to around 4,100K, keep the ISO low, and use a small aperture (f/8–f/11) for sharp focus. A shutter speed of about 1/160 sec works well for most setups. Underexposing the green screen slightly will preserve its color, making it easier to key out later. Finally, switch to manual focus to ensure your shots are sharp and consistent.
Take a few test shots and tweak the settings as needed to get everything just right. Once everything is fine-tuned, your booth will be ready for action!
Troubleshooting and Best Practices
Even with a well-planned setup, green screen photo booths can face challenges that affect photo quality and the overall guest experience. By anticipating common issues and following best practices, you can keep things running smoothly.
Avoiding Common Mistakes
One of the most frequent problems is lighting issues. Uneven lighting can create shadows or bright spots, making it harder to remove the background cleanly. As ProCyc explains, “So many postproduction problems can be eliminated through the proper use and distribution of lighting.” Taking the time to evenly light your screen can save you hours of frustration later.
Another issue is color spill, where green light reflects off the screen and onto your subjects, giving them an unnatural hue. To minimize this, ensure guests stand at least 8 feet from the backdrop and adjust the lighting to reduce reflections.
Motion blur can also be problematic, especially in high-energy events where guests move quickly. Increasing your camera’s shutter speed can help capture sharper images and freeze the action.
Wardrobe choices can interfere with the green screen effect. Green clothing or reflective accessories can blend into the backdrop or create unwanted effects. Let event organizers know about the green screen setup ahead of time so they can share wardrobe tips with guests.
Lastly, screen imperfections like wrinkles, stains, or tears can become glaringly obvious in the final images. Steam fabric screens before events to remove creases, and inspect painted screens for any damage. Marking the floor with tape can also help guide guests to the ideal spot for keying.
Once these common pitfalls are addressed, focus on keeping your equipment and software in top condition.
Maintaining Equipment and Software
Regular maintenance is key to ensuring your setup works reliably. For fabric backdrops, clean them weekly with a vacuum equipped with a soft brush or use a damp cloth and mild detergent for spot cleaning. Avoid harsh chemicals that could damage the material. To prevent creases, roll fabric screens onto sturdy tubes rather than folding them, and store them in a cool, dry place away from direct sunlight. Keeping the storage area at a stable humidity level can also prevent mold and mildew.
Handle backdrops carefully – always with clean hands – and address minor issues like small tears or stains promptly to avoid costly replacements down the line.
For lighting, consistency is crucial. Position lights at equal distances on either side of the green screen to maintain even illumination. This helps avoid uneven shadows or bright spots that can complicate background removal.
Don’t overlook your software. Keep it updated to ensure you have access to the latest features and bug fixes. Test all functions before each event to catch any issues early.
Once maintenance is covered, think about how to adapt your setup for different event types.
Practical Considerations for US Events
When planning for US events, it’s important to account for venue-specific needs. For example, wedding receptions often run late into the evening, so your lighting setup must perform well in low-light conditions. Corporate events may require professional, branded backgrounds, so having a selection of business-appropriate options can be a big plus.
Seasonal events bring their own challenges. At Christmas parties, guests may wear sparkly or metallic outfits that reflect light differently, while Halloween costumes might include green elements that interfere with keying. Tailor your background options to match the event’s theme to enhance the overall experience.
Outdoor events add another layer of complexity. Natural sunlight can be unpredictable, so position your setup in shaded areas whenever possible. Bringing extra lighting equipment can help maintain consistent illumination as the light changes throughout the day.
Accessibility is another important factor. Make sure your setup accommodates guests using mobility devices by adjusting camera heights and keeping pathways free of obstacles.
Lastly, consider the venue’s power capabilities. US venues can vary widely in their electrical setups, so bring extension cords rated for your equipment and have backup power options ready. This is especially important for outdoor events or venues with limited outlets. Checking power requirements ahead of time can help you avoid unexpected disruptions.
Conclusion
Setting up a green screen photo booth the right way can make all the difference in producing seamless, high-quality photos. Every component – whether it’s the backdrop, lighting, or software – plays a role in delivering a polished final product. Together, these elements create the foundation for a consistently great photo booth experience.
Key Tips for a Flawless Setup
-
Choose the Right Backdrop: Opt for a pure, matte green background to ensure clean keying.
-
Master the Lighting: Use even lighting to eliminate shadows and prevent uneven coloring.
-
Fine-Tune the Software: Configure your software carefully for accurate results.
-
Mind the Distance: Maintain proper spacing between subjects and the backdrop to avoid color spill.
-
Test Everything: Conduct thorough pre-event tests to catch and fix potential issues.
By paying close attention to these details, you can ensure sharp, professional results every time. Regular software updates are also essential, as they provide access to new features and improve reliability, helping you avoid technical hiccups when it matters most.
Creating Memorable Photo Experiences
Green screen technology opens up endless possibilities for creativity and personalization. High-quality digital assets and custom backgrounds that fit the event theme can elevate the guest experience. On the other hand, using pixelated or low-resolution visuals can expose the artificial nature of the setup, detracting from the overall effect.
Interactive features and real-time effects add an extra layer of fun, turning a simple photo session into a dynamic and engaging activity. Beyond entertainment, a well-designed green screen photo booth can also serve as a powerful marketing tool. It can help you collect customer data and generate shareable social media content, extending the reach of your event.
Consistency and reliability are what set professionals apart. Regular equipment maintenance, proper storage, and a systematic approach to troubleshooting are critical to ensuring your photo booth performs smoothly at every event.
Finally, adapting your setup to fit the needs of different events – whether it’s a corporate function or a private party – demonstrates your expertise. Tailoring backgrounds and other details to match the occasion ensures your service leaves a lasting impression on guests and clients alike.
FAQs
What are some key mistakes to avoid when setting up a green screen for a photo booth?
When setting up a green screen photo booth, a few common mistakes can mess with your final results. One big issue is uneven lighting, which can lead to shadows or bright spots that disrupt the background replacement process. Another thing to watch out for is green clothing or shiny accessories – they can blend into the green screen and create strange visual effects.
Pay attention to the condition of your green screen. It should be clean, smooth, and free of wrinkles, as any imperfections can become visible in the photos. Also, make sure there’s enough space between your subject and the backdrop. This helps avoid color spill, where green light reflects onto the subject and affects the image quality. Lastly, double-check your camera setup. Proper angles, exposure settings, and positioning are key to capturing sharp, professional-looking images.
What’s the best way to set up lighting for a green screen photo booth?
To achieve optimal lighting for your green screen photo booth, ensure the green backdrop is evenly illuminated with 4 to 6 light sources. Position these lights high and angled toward the backdrop to minimize shadows and maintain a uniform color. It’s equally important to light your subject separately and position them at a proper distance from the backdrop. This helps avoid unwanted shadows or light spilling onto the green screen.
For a polished, professional look, consider using a three-point lighting setup for your subject. This includes a key light (the main light source), a fill light (to soften shadows), and a backlight (to create separation from the background). This setup not only enhances the overall quality of your photos but also simplifies post-production editing significantly.
What key features should I look for in green screen software to create a memorable photo booth experience?
When selecting green screen software for your photo booth, it’s essential to prioritize tools that improve both usability and guest enjoyment. Features like AI-powered background removal deliver sharp, polished results, while customizable backgrounds let guests add a personal touch to their photos, creating a memorable experience.
Another handy feature is real-time previews, which allow users to instantly see their final image. This not only adds an interactive element but also makes the entire process more engaging and enjoyable.
To further elevate photo quality, consider software with automatic background replacement and options to manage even lighting. These tools ensure every shot looks professional and leaves a great impression on your guests.
Ready to add passive revenue to your venue? Take the 60-second kiosk quiz to find your perfect match, or compare all models side by side.